Introduction
In this tutorial, we will guide you through the process of implementing custom tags in your expert booking system. By utilizing these tags, you can enhance how prospects filter and find relevant experts based on their specific needs. Follow our step-by-step instructions to set up categories and tags effectively within your Experts Dashboard.
How to instructions
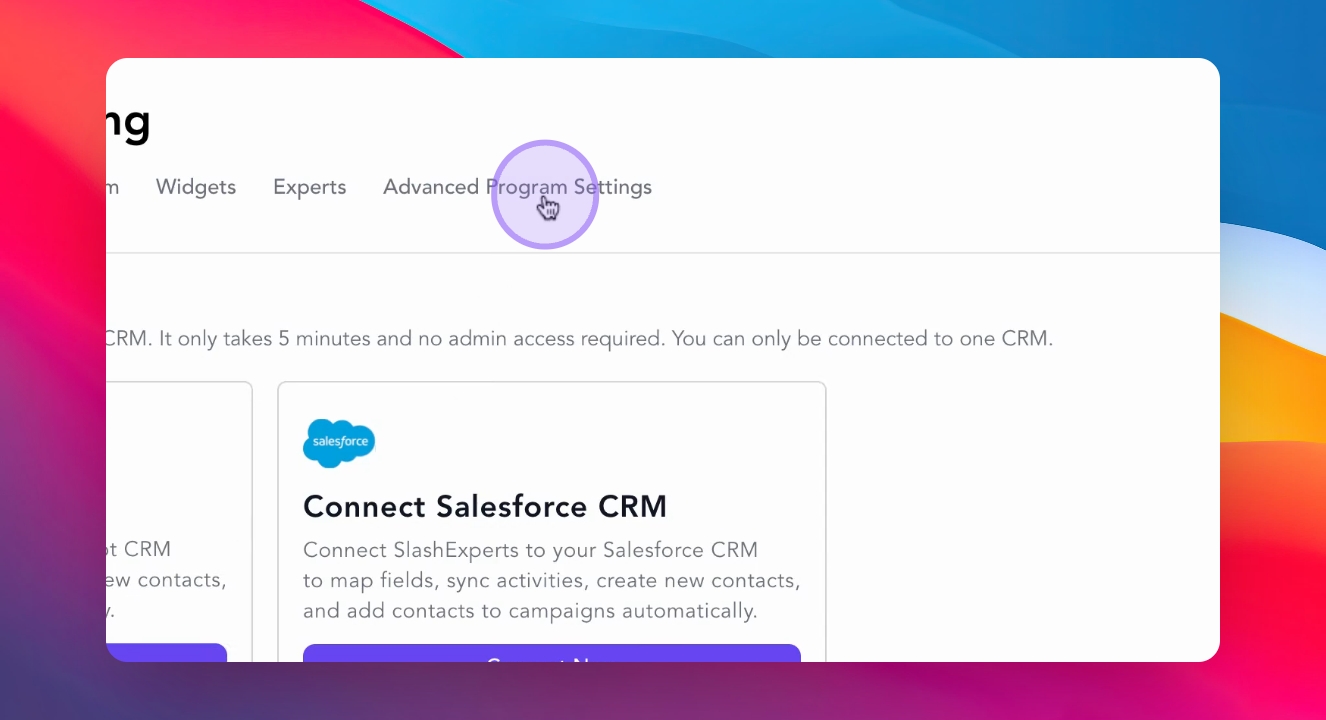
1. Access the Experts Dashboard
Begin by navigating to your Experts Dashboard and clicking on the Advanced Program Settings tab.
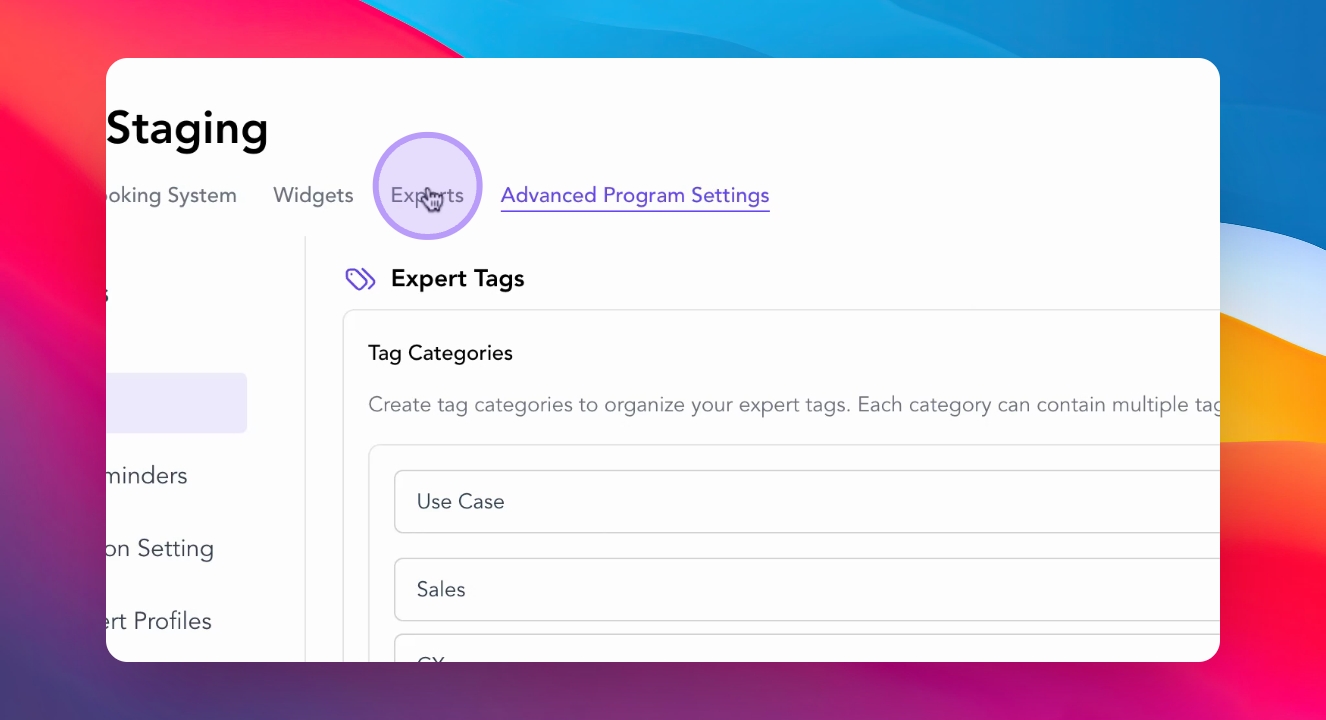
2. Activate Expert Tags
Next, toggle on the Expert Tags feature to activate the tagging functionality.

3. Add Categories and Tags
Add your first category, and under each category, include specific tags that align with your program needs.
4. Customize Tagging
You may add as many categories and tags as your program requires. There are no limitations on the number of tags you can create.
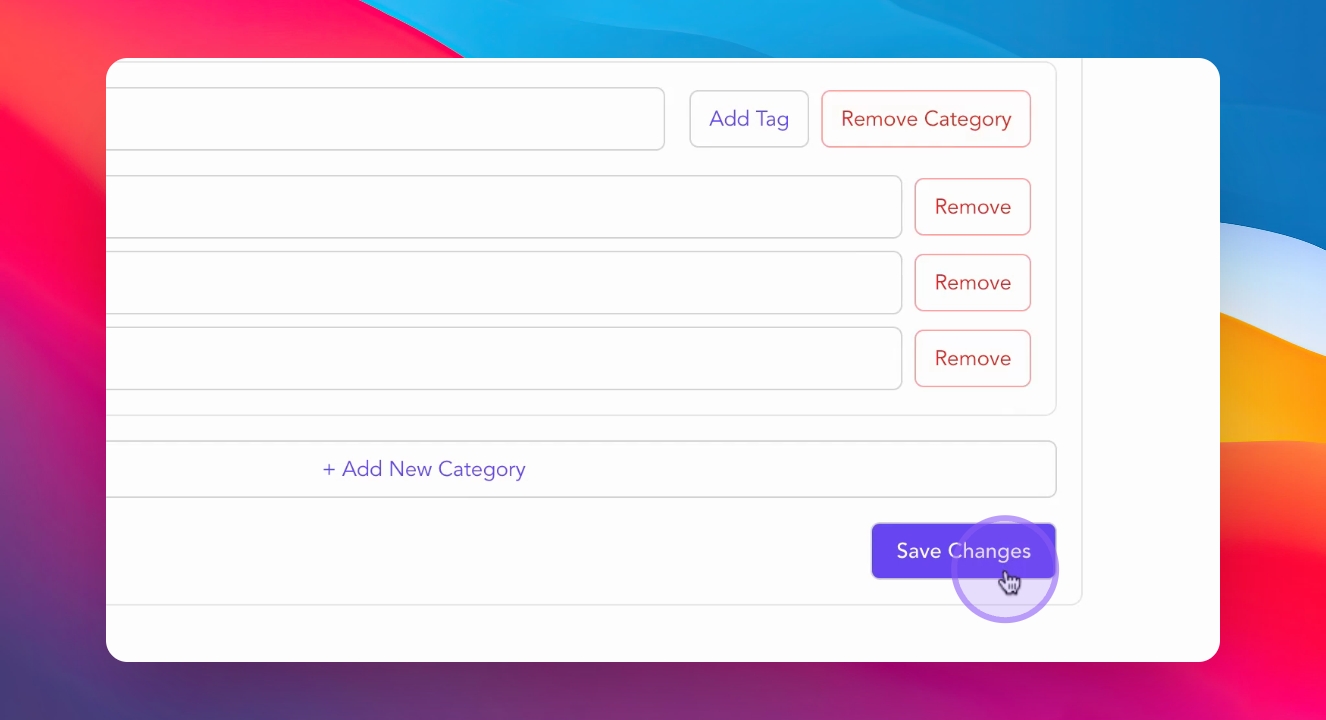
5. Save Changes
Once you have added your tags, click the Save Changes button to activate your new tag structure.
6. Expert Self-Identification
After adding all your Expert tags, the experts in your program will be able to self-identify the tags that best fit their profile and expertise.
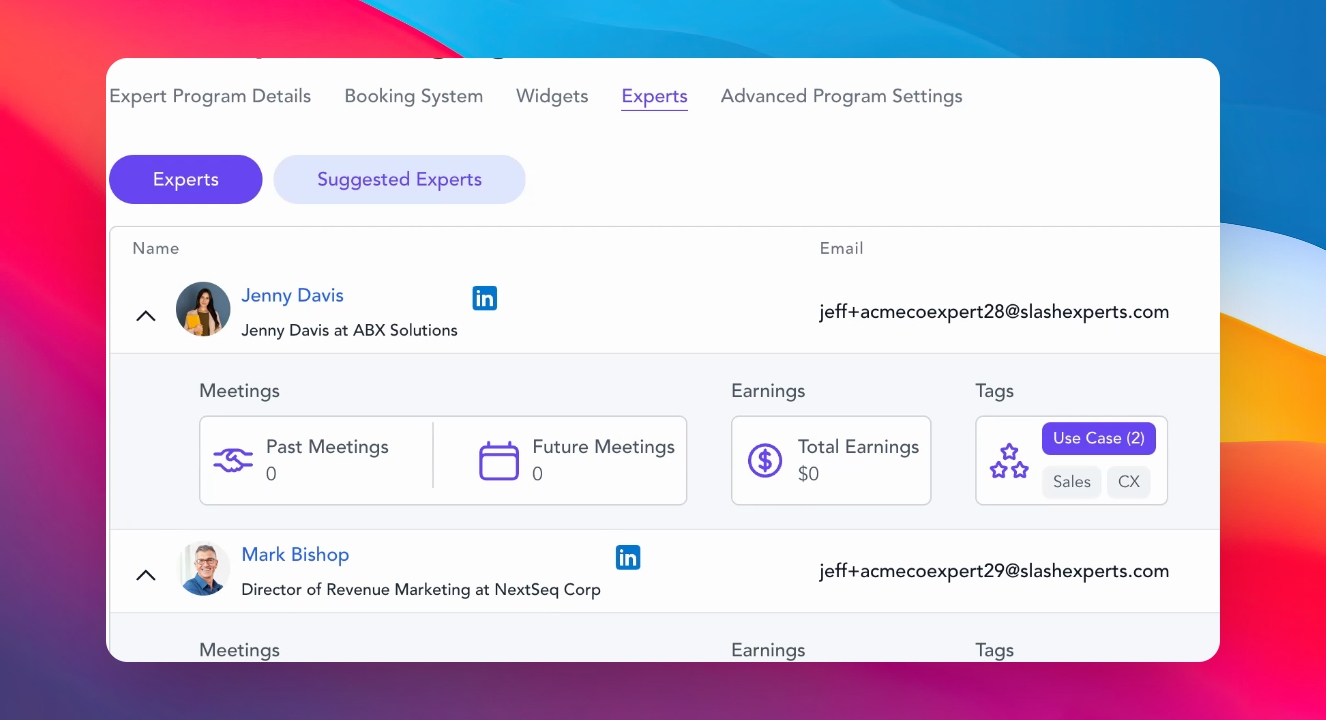
7. View Expert Tag Selections
To view Expert tag selections, click on the Experts tab in your dashboard.
8. Check Expert Profiles
Expand an expert's profile and view the tag section to see their selected categories.
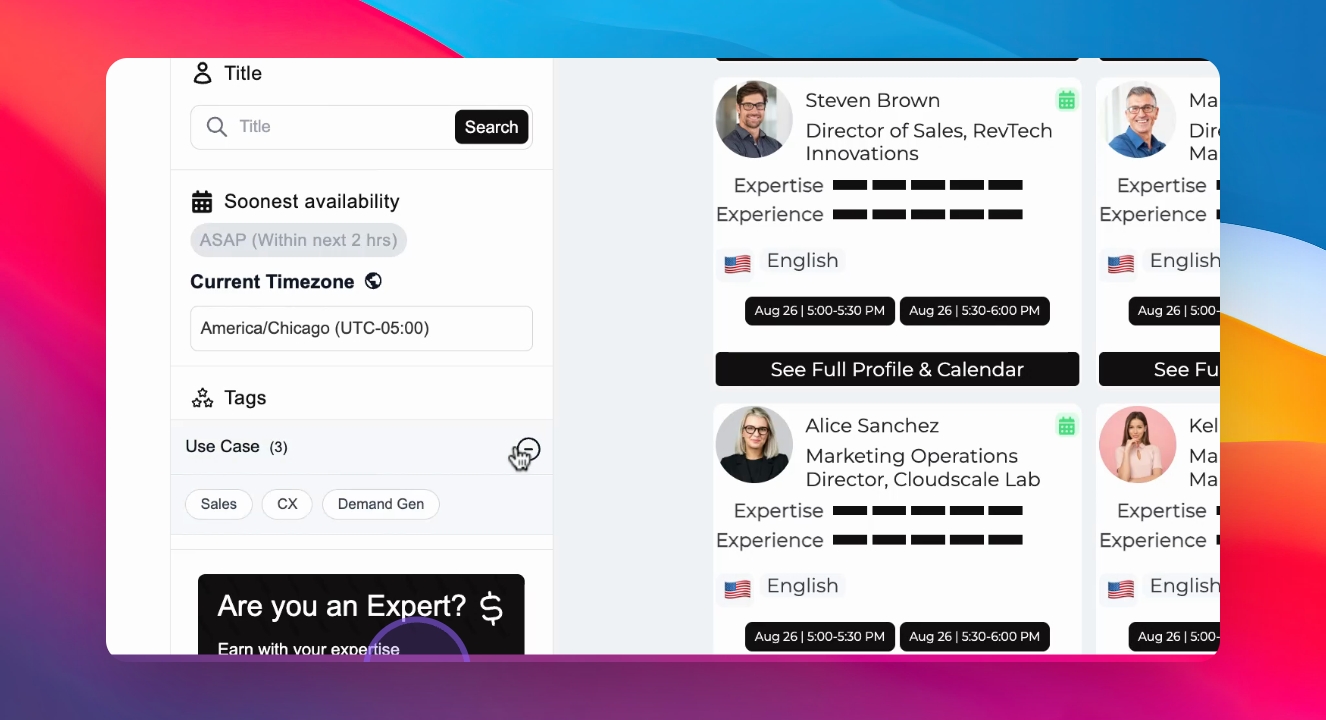
9. Filtering for Prospects
Once published on your website, prospects will be able to filter your expert booking system by the custom tags you have added, allowing them to find the most relevant experts for their specific needs and situation.
10. Seek Assistance if Needed
If you need help implementing custom tags or would like to upgrade your plan to the Growth tier to access this feature, reach out to your account manager or our support team.
Conclusion
By following these steps, you can effectively implement custom tags in your expert booking system, enhancing the experience for both experts and prospects.